
If I were an Archaeologist, a Museum Curator, a Restorer or All at once...
Inventing Circular stories to understand circularity through an ethnographic approach to objects
A WORKSHOP IN 7 STEPS
Explore the concept of circularity by inventing new functions and giving new meanings to objects. Additionally, you can also improve your observation, analytical, digital and communication skills in a playful manner.
If you are an artist or a craftsperson, this exercices can also give you ideas about how to highlight your engagement for your environnement when you communicate about your artworks, to share your skills with fellow artists and learn from theirs as well as to experiment with different up-cycling or recycling techniques.
Number or participants: between 1 and 20
(The exercices can be made individually or in a group.)
Duration : between 60 and 120 minutes
(Plus as long as you need to "restore" your object.)
Materials needed: everyday objects such as pieces of used furniture, household or organic waste, notebooks or sheets of paper, pens, pencils, smartphones
(For the optional "restoration part" (See steps 6 and 7) you might need other tools and materials too.)
ACTIVITY DESCRIPTION
Step 1: PREPARING THE WORKSHOP
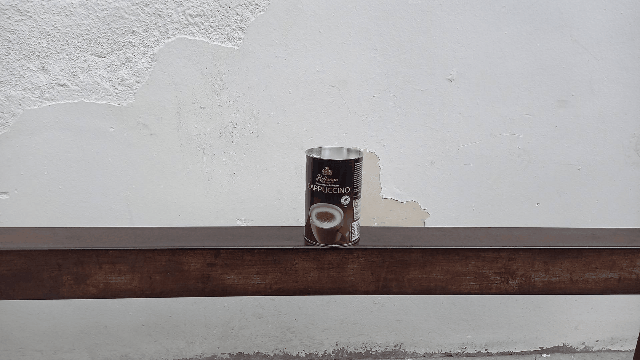
Collect everyday objects such as pieces of furniture, wood or any other waste material, old electronic devices, office equipment items, household waste such as plastic bottles or organic waste such as leaves, branches, etc.
Step 2: OBSERVATION AND DESIGN THROUGH IMAGINATIVE ROLE PLAYING
Imagine that you are archaeologists living in the 23rd century and you have just discovered these precious objects at an archaeological dig. To present what have found, you will have to describe it in a scientific manner in front of a committee composed of scientists, archaeologist, historians and curators.
To do so, choose one of the objects, observe it as if you didn't know what it was used for, and invent new functions for it. You can analyse your objects by answering the following questions and noting the answers:
-
Describe the object’s physical characteristics: materials, size, shape, weight, is it new or used, etc. Try to be as precise as possible.
-
What might have been the object's function or functions?
-
If there are any specific circumstances to be mentioned about how, when and where it is used, describe it.
-
What does the object tell about its user(s), owner(s) such as sex, age, economic, cultural or ethnic background, etc.?
-
What does the object tell about the society, the era, or the geographical zone in which it is used?
-
If you imagine that you object is only a remaining piece of something more complexe or if its physical apparence might have been different 200 years ago, imagine how it used to be. Make drawings.
-
You can also imagine legends around it, add humorous or ironical elements, etc.
Step 3: ARCHAEOLOGISTS' ASSEMBLY (PRESENTATION)
Sit around the table: now you form a scientific committee. Listen to each other's presentations about the found objects. When its your turn to make your presentation, be convincing. The committee members might ask questions and vote at the end if your thesis is plausible or not.
Step 4 : VISUAL STORYTELLING
If you managed to convince the committee of your thesis, you have the right to expose your object in a museum. To do so, you will work together with a museum curator to present your object and how it was used, but this time for the general public: the visitors of the museum. Work in pairs : choose a partner who will play the role of the museum curator and together, create a visual presentation of your object choosing one of the following methods:
-
video storytelling (interview the archaeologist and film it. Integrate images into your interview about the object. You can also make an edited version of your video using the YouCut application on your smartphone)
-
stop motion movie (animate your object by taking sequential photos of it to follow its movement in space)
-
narrative photography (take photos of the objects while they are being used)
-
display panel for exhibition (create a layout of photos and texts with an editing application such as Canva if you want to make it simple but you can also use more sophisticated programs such as Photoshop or its free online alternative, Photopea)
Once you're done, change roles and create a different type of presentation of the objects of the person you are working with.
Step 5 : SHARE YOUR VISUAL STORIES
SOME EXAMPLES FOR VISUAL STORYTELLING:
"Elastic surgical mask as a modestly practical multifunctional container lid"
"The branches of a giant Ficus tree as the long hair of a magician who lived a long time ago"
Step 6: RESTORATION
These last parts or the training workshop is optional, as it is more time demanding and might also require semi-professional materials as well as some experience in crafting. You can do it together or in a blended setting.
Based on how you imagined and sketched what your object might have looked like some 200 years ago, you can entrust its restoration to a professional... That might be your own-self, of course as we are still in role playing.
Here are some examples on how you can restore objects and images based on the imaginary functions that you attribute to them:

From signs to ornament
up-cycling images through digital creative techniques
From everyday object to
jewellery
up-cycling objects through arts & craft techniques


From organic materials and waste to jewellery
up-cycling objects through arts & craft techniques using resin


From industrial waste to decorative pieces of fourniture
up-cycling objects through arts & craft techniques using acrylic paint and resin


From pieces of wood, branches and leaves to decorative fragments
up-cycling objects through arts & craft techniques using markers, varnish and metal findings


Step 7: EXHIBITION
If you went through all the 6 previous steps, and if you have the space, organise an exhibition of the restored objects.
Let's resume the 10 skills you might improve through the previous exercices:
1. written and oral linguistic and communication skills - by giving detailed and precise descriptions about the objects, its functions (Steps 2 and 3)
2. observation and analytical skills - by learning a method to describe and analyse things objectively, inspired by scientific argumentation (Steps 2 and 3)
3. skills in public speech and argumentation (Step 3)
4. self-esteem and self-awareness - the complexity of the exercise make appeal to many different types of skills and knowledge. It is also a way to raise awareness about the existing skills by exploring the difference between what we think that we know and what we really know. (All the Steps)
5. emotional management and negotiation skills - the exercise improves the capacity to think and analyze from a neutral and objective point of view without adding emotional content (Steps 2 and 3).
6.intercultural skills - one needs to think about multiple ways how and object/image might be used or interpreted
7. participation and co-creation (if you work in a group) - participants take part actively in deciding about the techniques to use, the outcomes and the message of their creations. (Step 4)
8. digital communication skills (Steps 4 and 5)
9. manual and craft skills (Step 6)
10. organisational skills through setting up an exhibition (Step 7)